Editing in mastering: handling cuts and fades at the head, tail and also in the middle
- Author Profile
- Recent posts

Pianist, Composer, Arranger, Sound Engineer, Writer, Blogger
Alessandro Fois is a musician, composer, pianist, arranger and sound engineer. Since 2018, he has also been a writer, blogger and webmaster. He currently resides in Ivrea (Turin) where, in addition to the above activities, he manages Lycnos, studio for audio, video and web services, and the recording studio Glamour Recording Studio.
Editing in mastering
A cross-fade, the most emblematic of editing-montage operations.
Before, during or after the various mastering operations, at some point it will be necessary to perform the editingunderstood here essentially as audio editingobviously to be applied to finished mixes and, in some cases, to their stems.
These operations are essentially carried out with the common "cut/copy-paste" and by means of the fading simple and crossed and their variants.
The purposes of editing can be summarised as:
- noise prevention and cleaning, especially at the beginning and end of the piece (but sometimes also during small performance breaks)
- cutting and merging several parts of the song (e.g. for the creation of 'short' and 'long' versions of the basic musical piece
- creation of a 'fade out' (fade out) that does not exist in a song, or the refinement of an existing fade out
In case of stem masteringit is advisable to have all the stemsin order to be able to carry out 'simultaneous parallel' operations on all tracks more easily, quickly and without risk.
These are mainly operations to be carried out at the head and tail end of each track, in order to determine clean, pleasing and well timed attacks and conclusions of the mixes.
But sometimes it is also a matter of removing, moving, adding parts of the song to make some different versions, to be added to the main song or as a substitute for it.
Therefore, after preliminary findings:
- that the mix does not need to be modified by the sound engineer who created it
- that no stems need to be requested, or after obtaining the necessary ones
I would recommend performing this operation immediately, in order to finally be able to master 'clean' files, it being understood that it will always be possible to correct something later, as these are not 'destructive' processes.
Cutting, silencing, fading
Start Cutting
It must be done exactly one instant before the start of the useful audio programme (max. 1ms will be perfect), in order to eliminate with a cut sharp and precise any spurious noise, hum or rustle at the beginning of the song, taking extreme care not to erase even the slightest bit of the audio programme's attack times (particularly high risk in songs with fade-inas the crescendo sound tends to blend in with the background noise).
To avoid problems, monitor at high volume to detect even the slightest unnaturalness, and jointly display the appropriately enlarged waveform.
When in doubt, it will be better to anticipate the cut point by a few moments rather than risk even minimal truncation of the song.
End fading
Start Silencing
It will provide for the addition, at the head of the song, of a time of absolute silence (head-silence) of about 200-500 msideally about 1/3 of a second (333ms), however never less than 1/5 of a second or more than half a second.
This time is advisable in order to ensure a sufficiently fast but still correct and clean start of the music even in certain players that require start-up times particularly slow (e.g. some CD devices), otherwise it could happen that the first instant of the audio programme is "truncated when listening".
Start Fading
It should have a duration equal to or less than the Start Silence referred to above.
In reality, this is more virtual than useful, certainly without audible effects, but it does guarantee the prevention of any noise in the attack.
End cutting, silence, fading
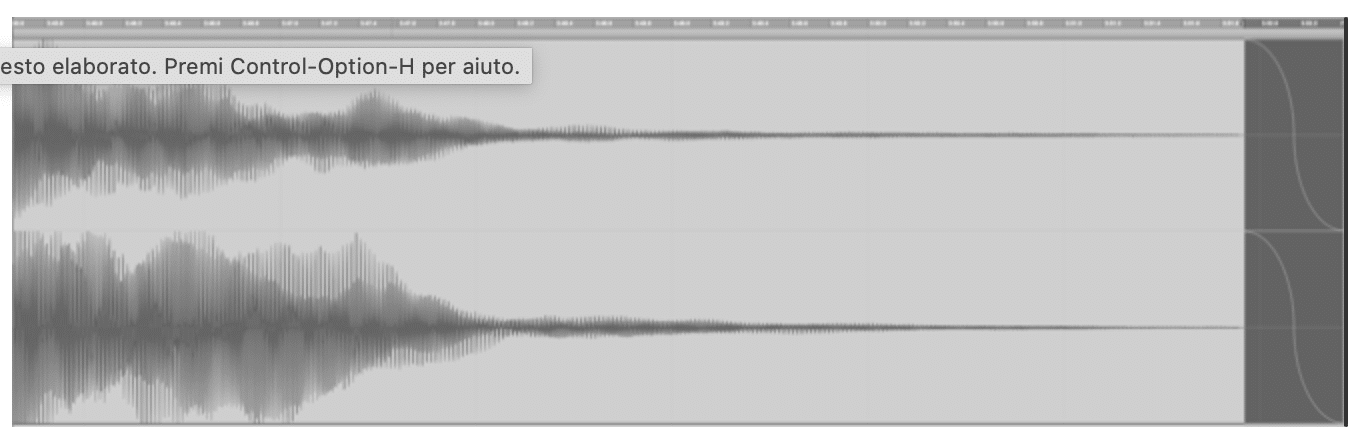
It should always fully include the cut-off times of the reverb recorded in the mix (and also of any reverb we may have inserted during mastering).
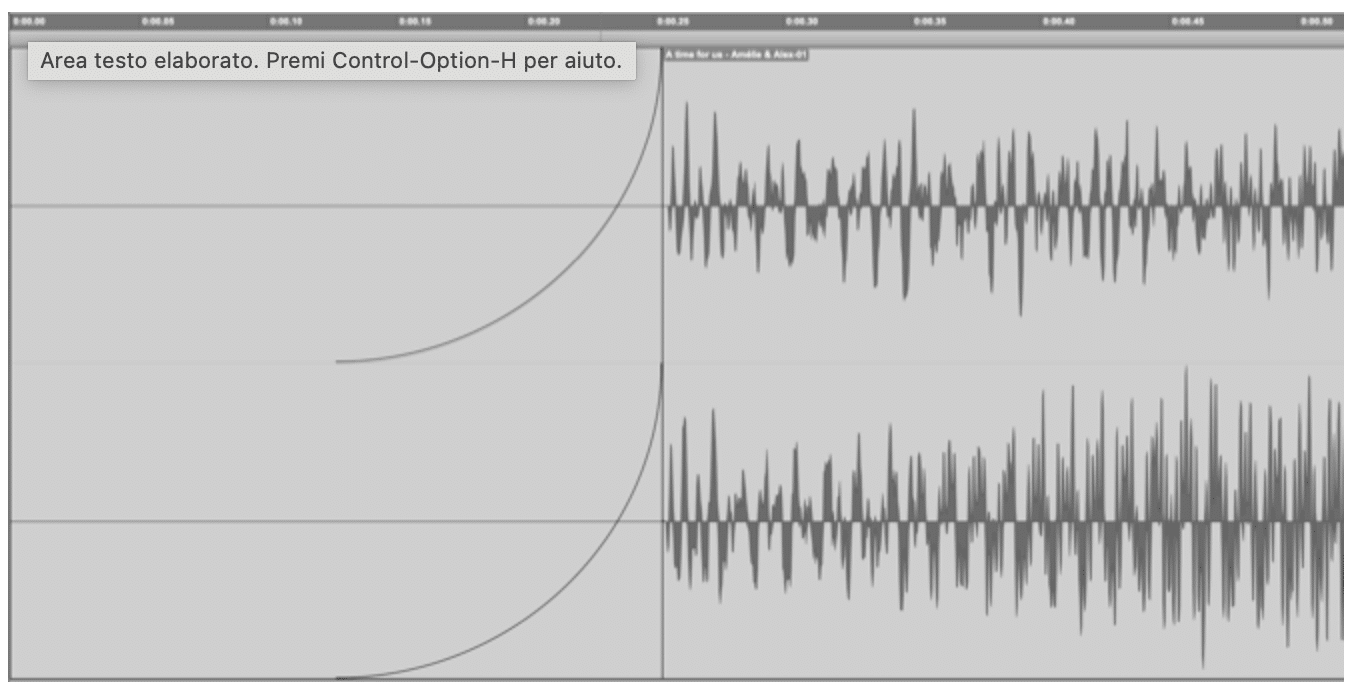
Example of Start Silencing & Fading, with as steep a gradient as possible and with a length of approximately 250 ms, calculated on the time index of the timeline, zooming in appropriately.
In the event that the final reverberation recorded in the mix appears too long, it may also be considered (together with the artistic director) to shorten it by means of a End Cutting establishing the point of completion of the decay, and then a End Fading progressive and well-calibrated, in order to simulate a 'natural' decay curve faster than the original one.
It may also happen that we come across an awkwardly cut mix, with too sharp a truncation in the tail, in which case it will have to be appropriately shortened and faded with a cutting and fading operation in order to create a harmonious and gradual decay.
It may still happen that we operate with a mix "faded"too abruptly or not progressively, and it will be our task to restore its grace, progressiveness and cleanliness by careful use of volume automations.
In any case, at the end of the piece, after the complete decay of the volume of the piece and its tail resonances, it will be good to add a brief End Silence of about 200-500 ms or slightly more.
Middle cutting, insert
Occasionally, the customer may also request a short version of the piece, which will require the deletion of one or more central musical themes and the precise cuing of the two edges, operated by means of a cross-fade.
In that case, here are some recommendations:
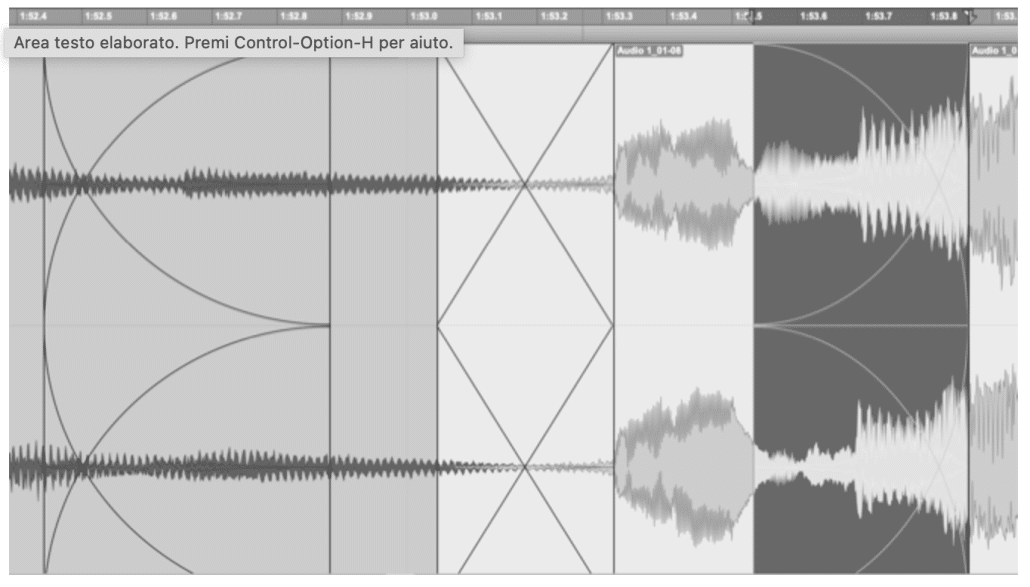
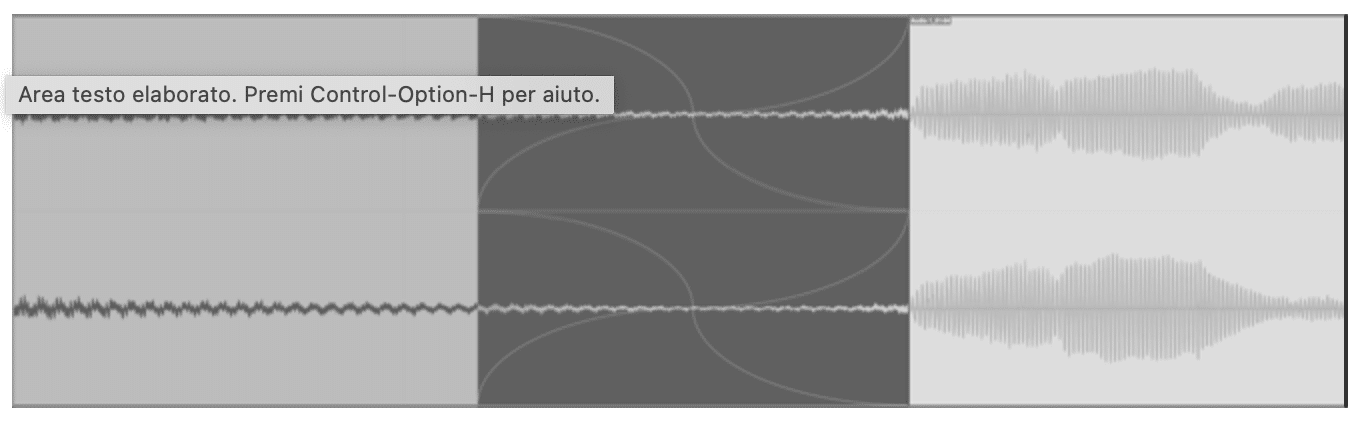
- as far as possible, choose the no. 2 cut-off points in positions immediately preceding 'important' peaks, positioning yourself about 1 or 2 milliseconds before them; in this case, the crossfade time should be very short (about 5 ms straddling the 2 segments) and an asymmetrical crossfade curve should be chosen, such that the peak of the right segment, i.e. the 'incoming' one, is preserved more.
- in the absence of important peaks, the crossfade time should be longer, but try not to exceed (if possible) 40 ms of crossfade between the 2 segments; if a reduction in volume is perceived at the crossfade, use a shorter and "higher" crossfade (i.e. powered); if a decrease in volume is perceived in the incoming segment (right) with respect to the outgoing segment (left), choose an asymmetrical crossover curve (preserving the attack of the right segment); vice versa, perform the exact inverse operation; sometimes the asymmetry allows for graduation (more or less asymmetrical) and in this case choose the one that will produce a more homogeneous effect.
- in both cases, only lengthen the above-mentioned crossfade times if you cannot find a satisfactory solution, as excessively long times could lead to an abnormal 'chorus effect' at the crossfading point, resulting from the temporary overlapping of the two segments involved.
Similar warnings for the cuts and the crossfade in the case of an additional segment within the song
N.B.
If the production requires the entire track to be used in addition to any short and/or long versions, it will be advisable to make the cuts at the end of the mastering process, before the LUFS measurement and final export, so that the same operations do not have to be repeated several times.
In the event that a single cut version is required, renouncing the original, it will instead be advisable to immediately carry out the cutting and subsequent stitching, so as to work on a single definitive element.

In the picture, 3 different types of cross fading: in the centre a balanced fading, on the left a fading with conservative unbalancing of the right segment, on the right vice versa.


Leave a Reply
Want to join the discussion?Feel free to contribute!